
I’ve done quite a bit of stress baking over the last few months, and somewhere along the way I designed this neat system for a whole series of weekend-to-weekday chocolate treats. I got work down to a minimum by cheating on everything cheat-able. I figured out how to spread out the steps, so that any given day’s task is doable on a weekday night, some even while you heat up your lunch, if you work from home. Baking just one sheet cake, you’ll get a whole week’s worth of special desserts, plus some extra in the freezer for later. Here they are: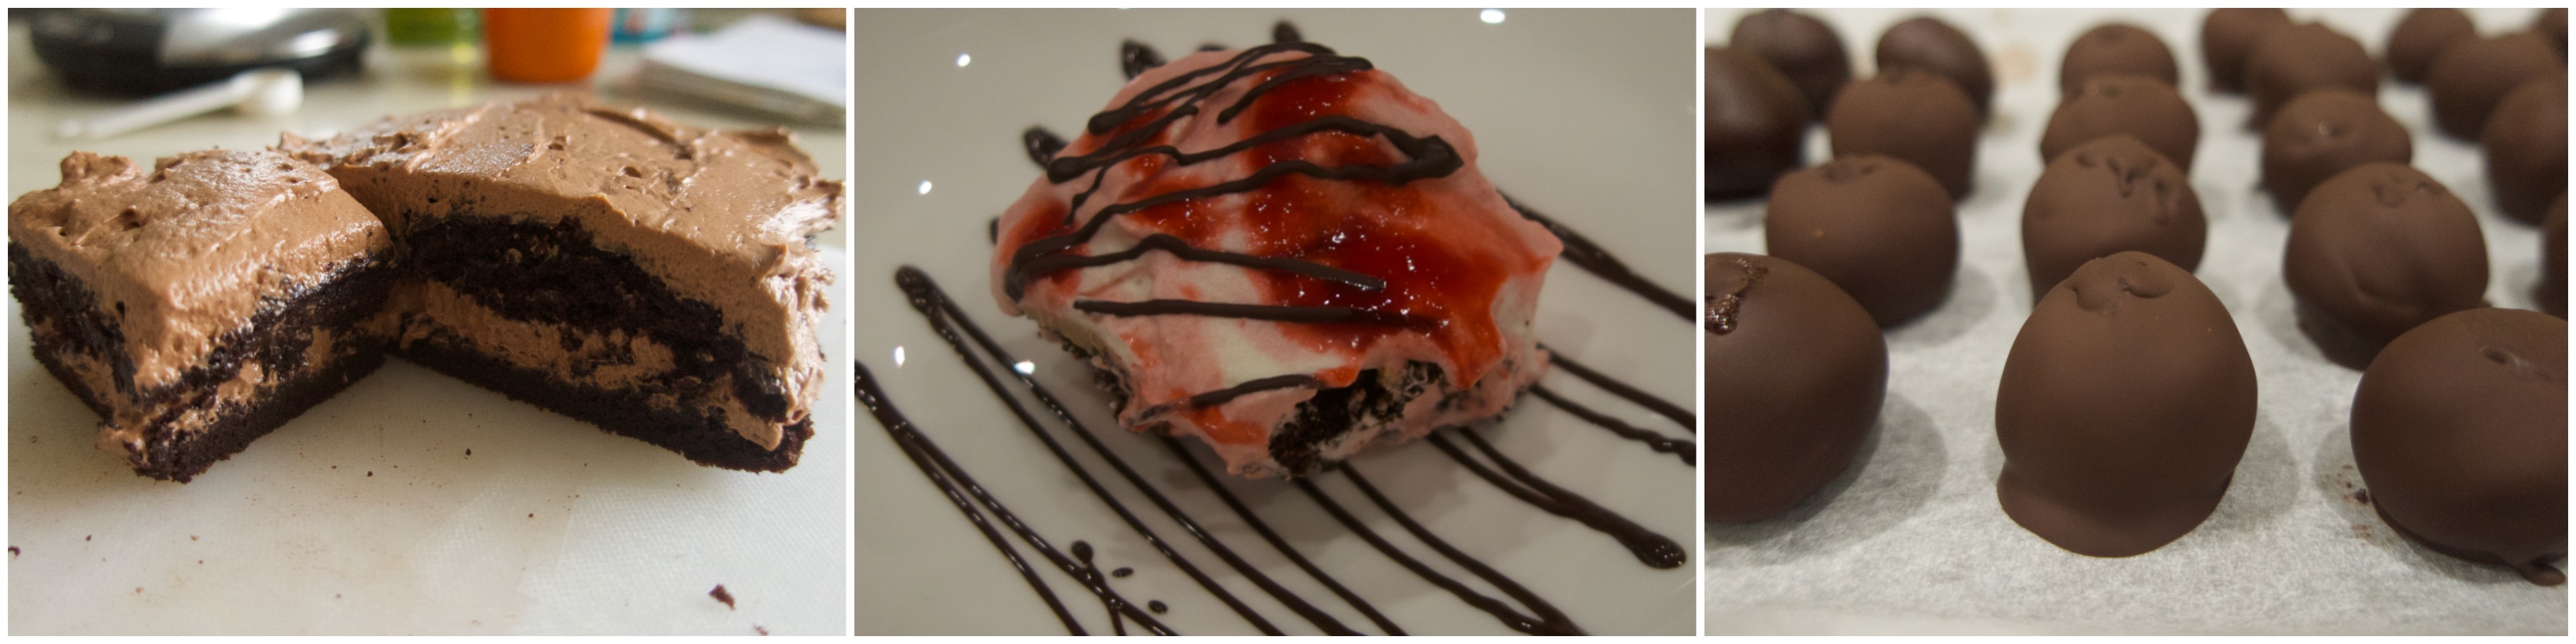
Now the steps: remember, you only need to do one step on any given day. You can also skip some steps, and still have treats – in other words, have your cake and eat it too;).
1. Chocolate buttercream
The bottom line of this step: keep chocolate buttercream in your freezer. There are a dozen different varieties of buttercream, which feel and taste different and require different amounts of work. For this project, any one of these will do, so I’ll list some options.
Whatever option you choose, you’ll need to flavour your buttercream. Feel free to experiment with this! Just avoid adding too much liquid, but otherwise more chocolate, less chocolate, coffee or no coffee, different alcohol or none, slightly more or less sugar, vanilla or no vanilla: you can tailor it to your tastes. If the buttercream curdles when you add flavouring, simply beat it at medium speed with a couple extra spoonfuls of soft butter to correct.
- Option 1: For those who like American-style buttercream, a.k.a. cake frosting: you’re in luck because it’s easy to make! The basic method is to beat soft butter in a mixer until fluffy, then sift in a whole lot of icing sugar (powdered sugar). You can add a raw egg yolk for a bit of complexity if you eat raw eggs. Finally, for a chocolate flavour add melted chocolate or cocoa, and I recommend a dash of Bailey’s or Kahlua if you have it, or a bit of coffee. Some recipes you can try: from BBC Food, from Preppy Kitchen, from Sally’s Baking Addiction, or try the one from the cake recipe suggested in Step 2. For the sake of spreading out work you can freeze a batch almost indefinitely, or keep it in an airtight container in the fridge for a couple of weeks.
I personally find American buttercream too sweet and a bit too heavy. Ok, I eat it happily when it’s served, but I don’t tend to make it myself. If you’re like me, I suggest that you make one of the European style butter creams below – a good time is when you have leftover egg yolks or whites – and keep in the freezer. It really changed my life when I started doing this: buttercreams, especially the meringue and custard varieties, are so decadent and festive, and you can bring all that specialness to your everyday by having some on hand.
- Option 2: I posted a French custard buttercream recipe, based on “Mastering the art of French cooking” by Julia Child, here. That post gives a small amount, so for the purpose of filling your freezer with yumminess I’d double or triple it. The idea is that you start out with a sweet custard, then beat in a lot of soft butter, and the flavouring. Make it on a weekend afternoon, or whenever you have spare egg yolks! This option has many advantages: delicious, creamy and custardy, and freezes and defrosts really well. It also works amazingly with the cute little sandwich cookies, but those take some work. The disadvantage – not relevant to this post at all – is that this buttercream is quite soft, so it doesn’t hold up well on a tall cake and it’s almost impossible to pipe neatly.
- Option 3: Or, if you have stray egg whites (happens to me more often than stray yolks) you can make Swiss meringue buttercream: light, fluffy and delicious, and also great for more ambitious projects like big cakes and decorating. The technique is to make a syrupy substance by heating and stirring egg whites with sugar until dissolved, cool it down, then beat with a bunch of butter until it’s wonderfully airy. The only disadvantage of this variety of buttercream is that it loses its consistency in the fridge or freezer, so you usually need to beat it again in the mixer just before use. After defrosting it might require a bit of added soft butter as well, to bring it back to life. Don’t stress if it curdles in the mixer; just keep beating at medium speed and add a spoonful or two of soft butter. Alternatively, you can freeze the egg white syrup itself, and do the whole beating with butter and flavouring when you’re about to use it.
I love the simple recipe and scientific approach in this post by The Cake Blog: The Meringue Buttercream Myth. I use about 25% less sugar than her (on the order of 350g). For a chocolate flavour I omit the vanilla in her recipe, and add about 150-200g melted chocolate, and a tablespoon or two of Baliey’s.
(I also quite enjoy watching John of Preppy Kitchen on youtube gushing about how gorgeous meringue is, but you can easily get away with the simpler Cake Blog method.)
2. An easy chocolate cake
A friend has recently recommended this great basic chocolate recipe: Ina Garten Beatty’s chocolate cake. Other that being way too sweet for me – which is easily remedied by using half the sugar – I love it: it’s a soft, moist, versatile cake that is quite simple to make. It’s a classic two-bowl recipe (dry bowl and wet bowl), no separating of eggs required, and it doesn’t have an aftertaste of baking soda. The taste is quite chocolatey and nicely balanced with a hint of coffee.
The lazy way: For the sake of this project I make it as a single sheet cake in a standard 9×13 inch baking dish, lined with baking paper (don’t bother buttering the pan). I use half her amount of sugar, but you can try full sugar first is you have a major sweet tooth, or 3/4 if you’re undecided. We’ll use whatever icing you have in the fridge/freezer, so no need to make the frosting in the recipe.
To skip every skippable step, you don’t have to sift the flour, sugar and salt. But do sift your cocoa powder, baking powder and baking soda, otherwise you’ll get big chunks that are near impossible to get rid of after you add the wet mixture. Sifting means push those ingredients through a mesh sieve with a spoon to save yourself the grief. I find this cake batter is so cooperative and so wet, it’s almost easier to mix it by hand with a whisk, but the mixer works fine, too.
Be careful with the baking time if you have a convection oven: check the cake (poke a fork in the middle) after 25 minutes. It’s done when the fork comes out clean. For a secret baker’s treat, cut off a hot corner slice and enjoy it “as is” with coffee or tea!
To let cool the cake, use the baking paper to lift it out of the dish onto a rack, or onto the countertop if you don’t have a rack.
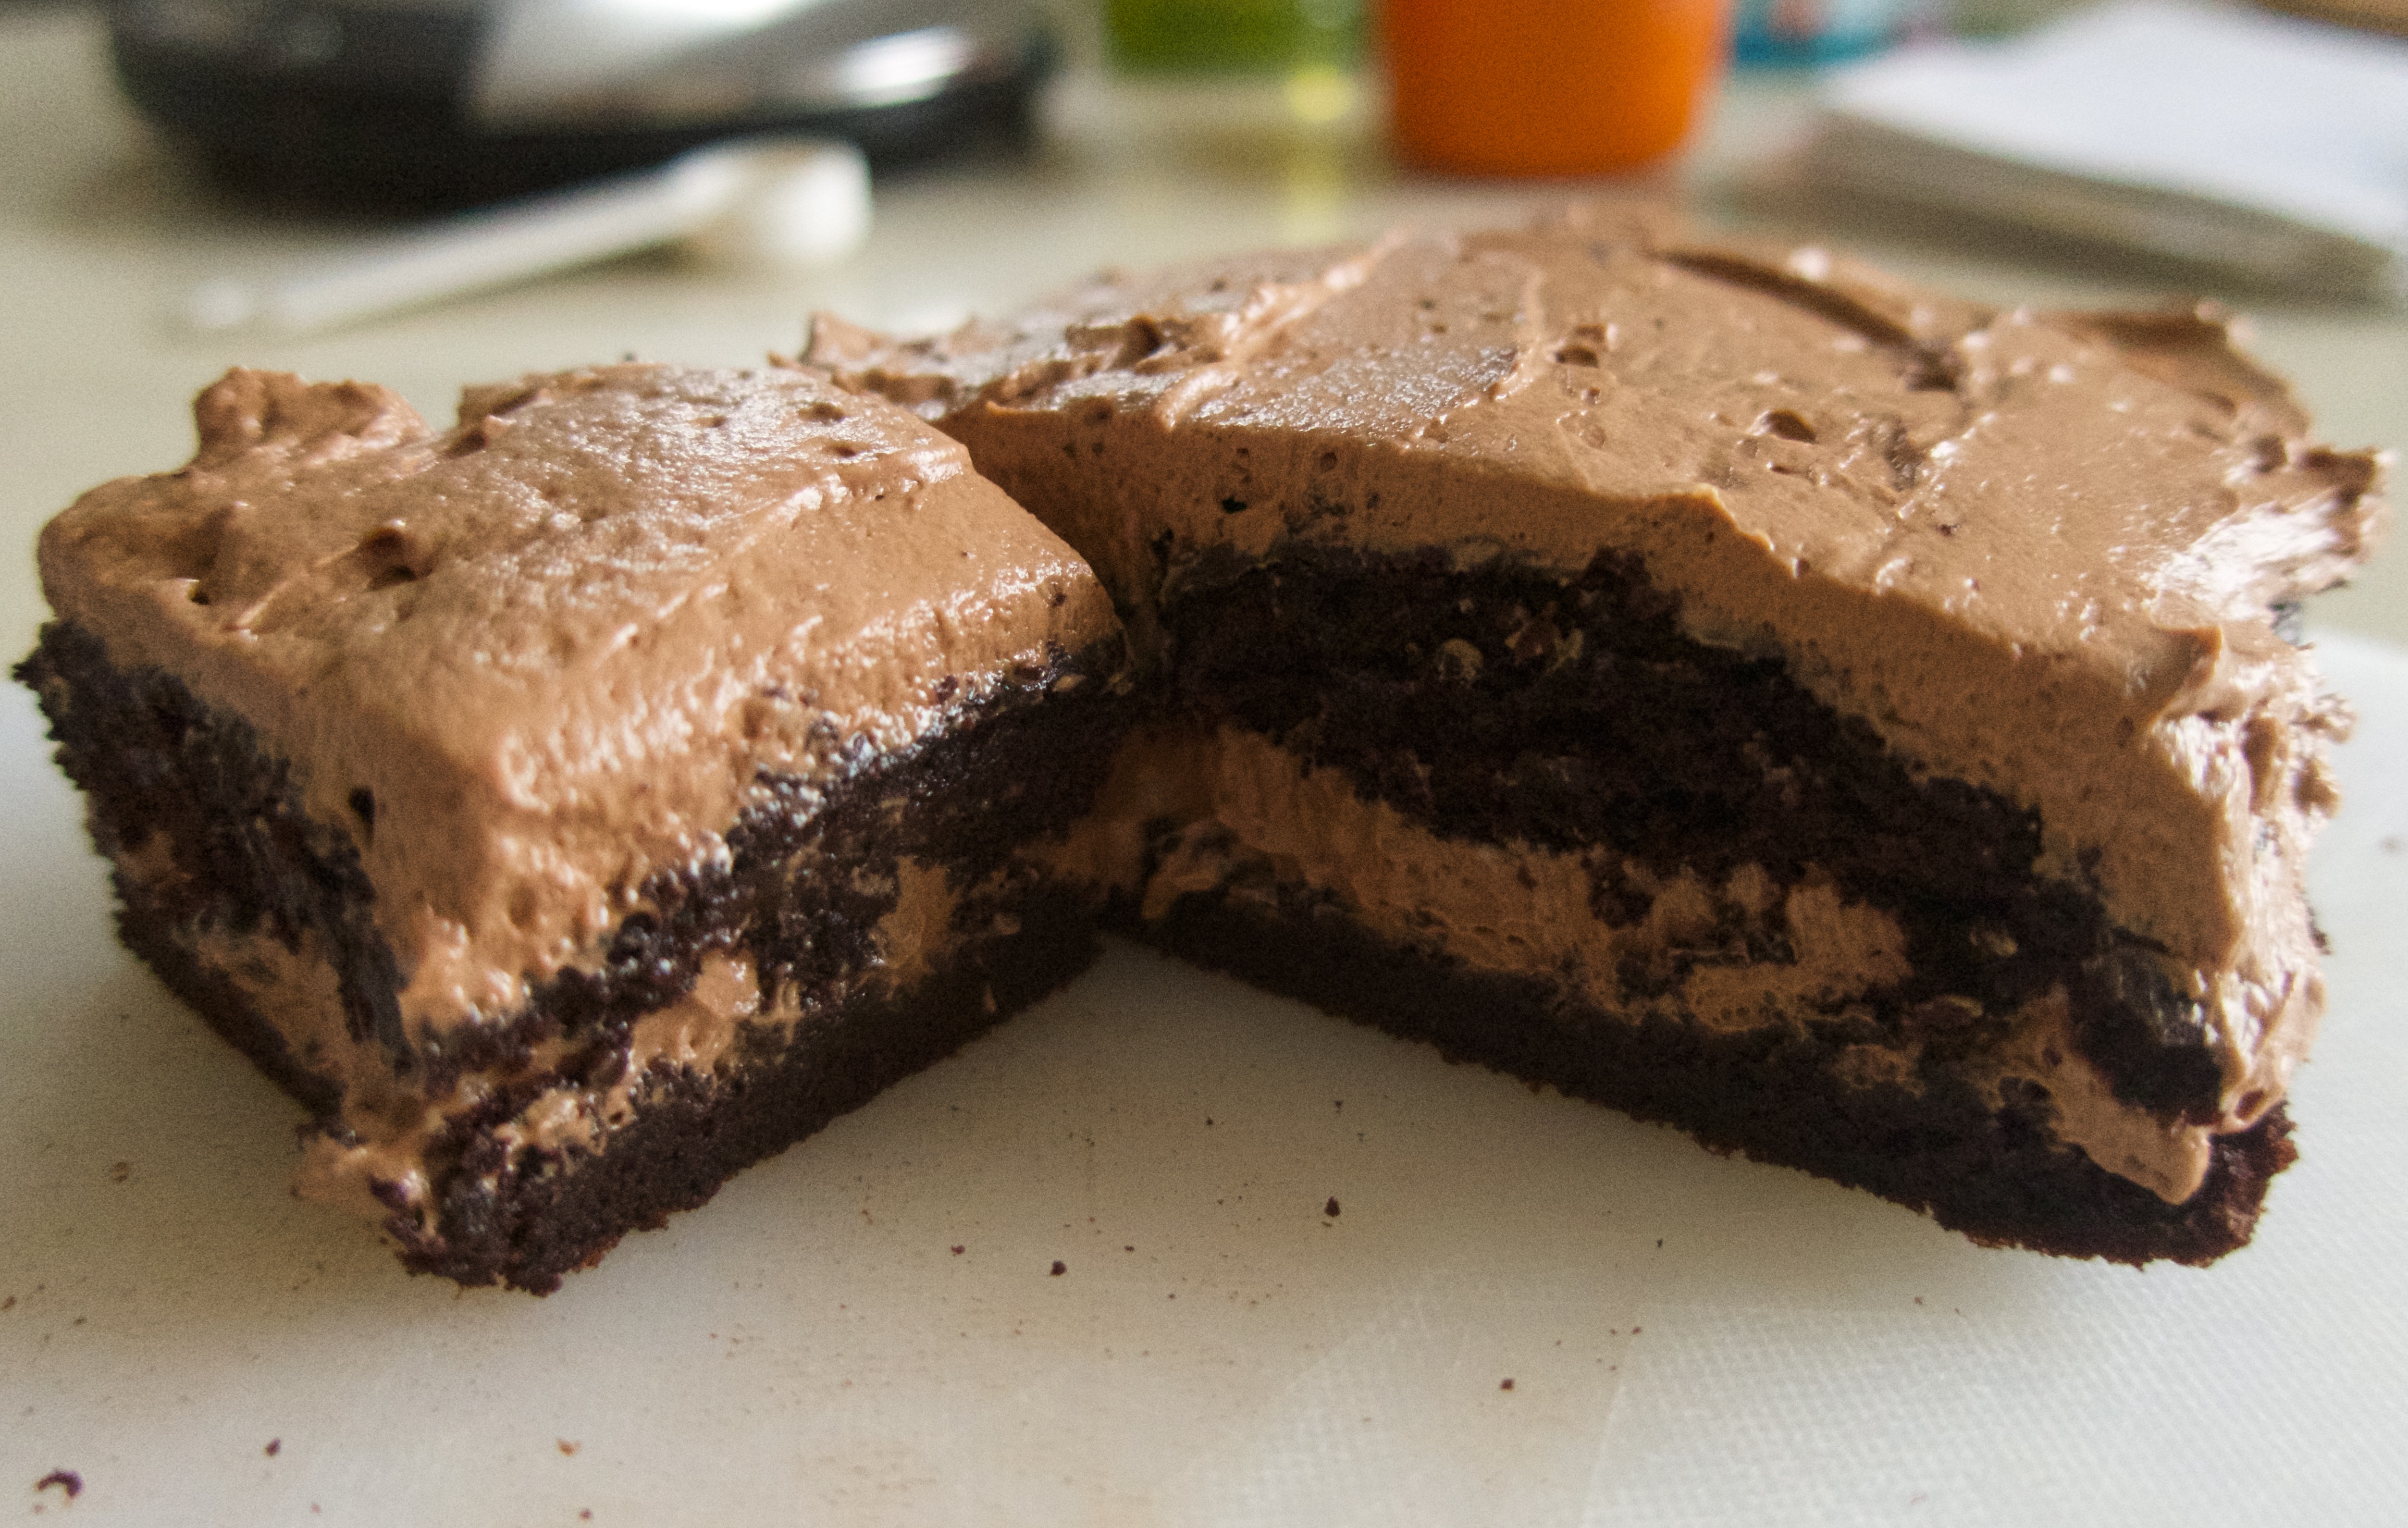
3. Ice that chocolate cake
Cut off one third of the room-temperature cake, and ice with the chocolate buttercream. Perfectly icing a cake takes me 2 hours, but icing it imperfectly is done in 3 minutes flat. You can either cut the cake in half horizontally to make a two-layer cake, or just spread the buttercream on top. If you have young kids, sprinkles are a winner, I prefer my slice without. Voilá, iced chocolate cake!
Pack up the rest of the sheet cake in airtight containers, and put in the fridge for a day or two, until you’re in the mood for the next step!
 4. Raspberry mousse chocolate trifle
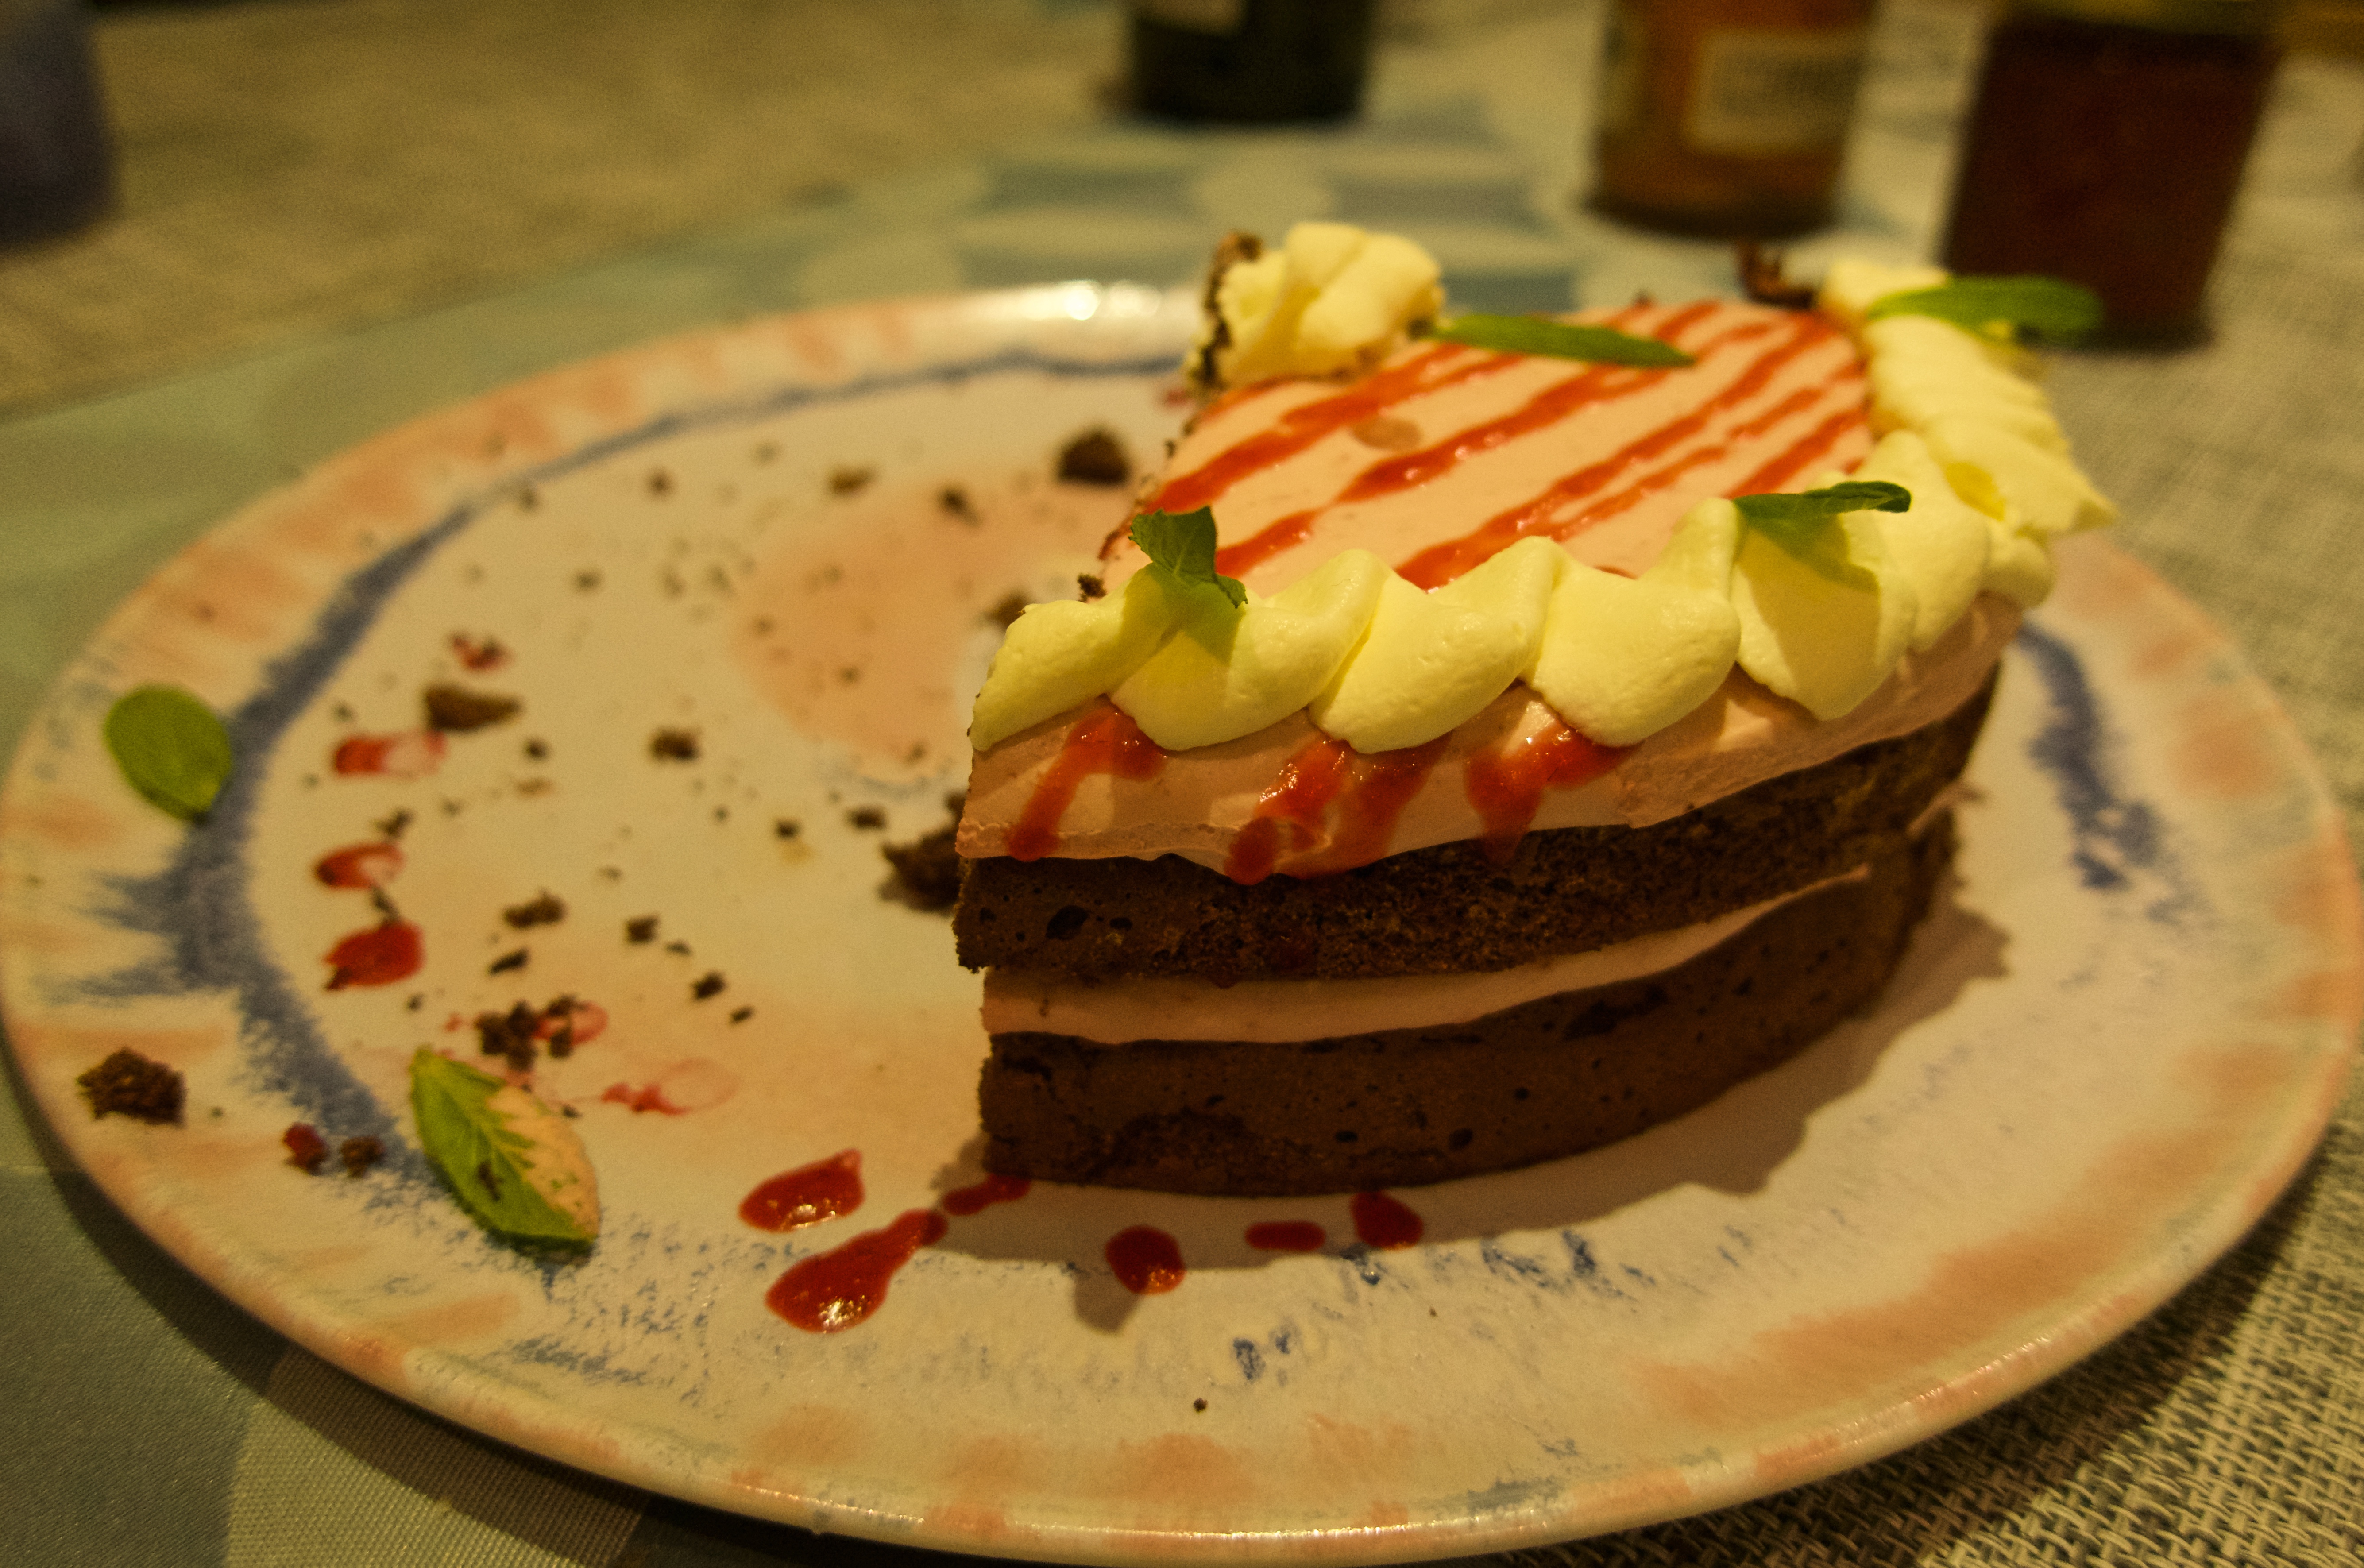 One of our family’s favourite cakes is a chocolate version of the Raspberry Mousse Cake by Natascha’s Kitchen. It’s chocolatey, fruity, and pink, which is all I, Pink, and Pixie want in a cake (respectively). You can make it a festive, pretty confection (like I do sometimes for Pink’s birthday, as in the picture); to do that you need the suggested gelatine in the raspberry mousse so it holds up, and it’s a tricky business to get the temperature just right. If the raspberry sauce is too warm, it kills the whipped cream, if it’s too cold, the gelatine congeals. But the good news is, for a trifle, you can skip the gelatine entirely!
The lazy way: Only make the raspberry mousse part of Natascha’s recipe, and omit the gelatine. Do cool your raspberry sauce, as heat is the death of whipped cream. On the other hand, feel free to leave the sauce in the fridge as long as is convenient: without gelatine, you can’t overcool it.
When the mousse is ready, take your next 1/3 sheet cake out of the fridge. Layer it with the mousse, in a container that has an airtight lid: first mousse, then cake pieces, mousse, cake pieces, mousse. Want it extra fruity? Add some fresh raspberries. Want it extra sweet? Spread your cake pieces with a bit of buttercream. Have some leftover melted chocolate? Drizzle it on. The chocolate-raspberry trifle is ready to eat! Keep it in the fridge with the lid on for 3-4 days.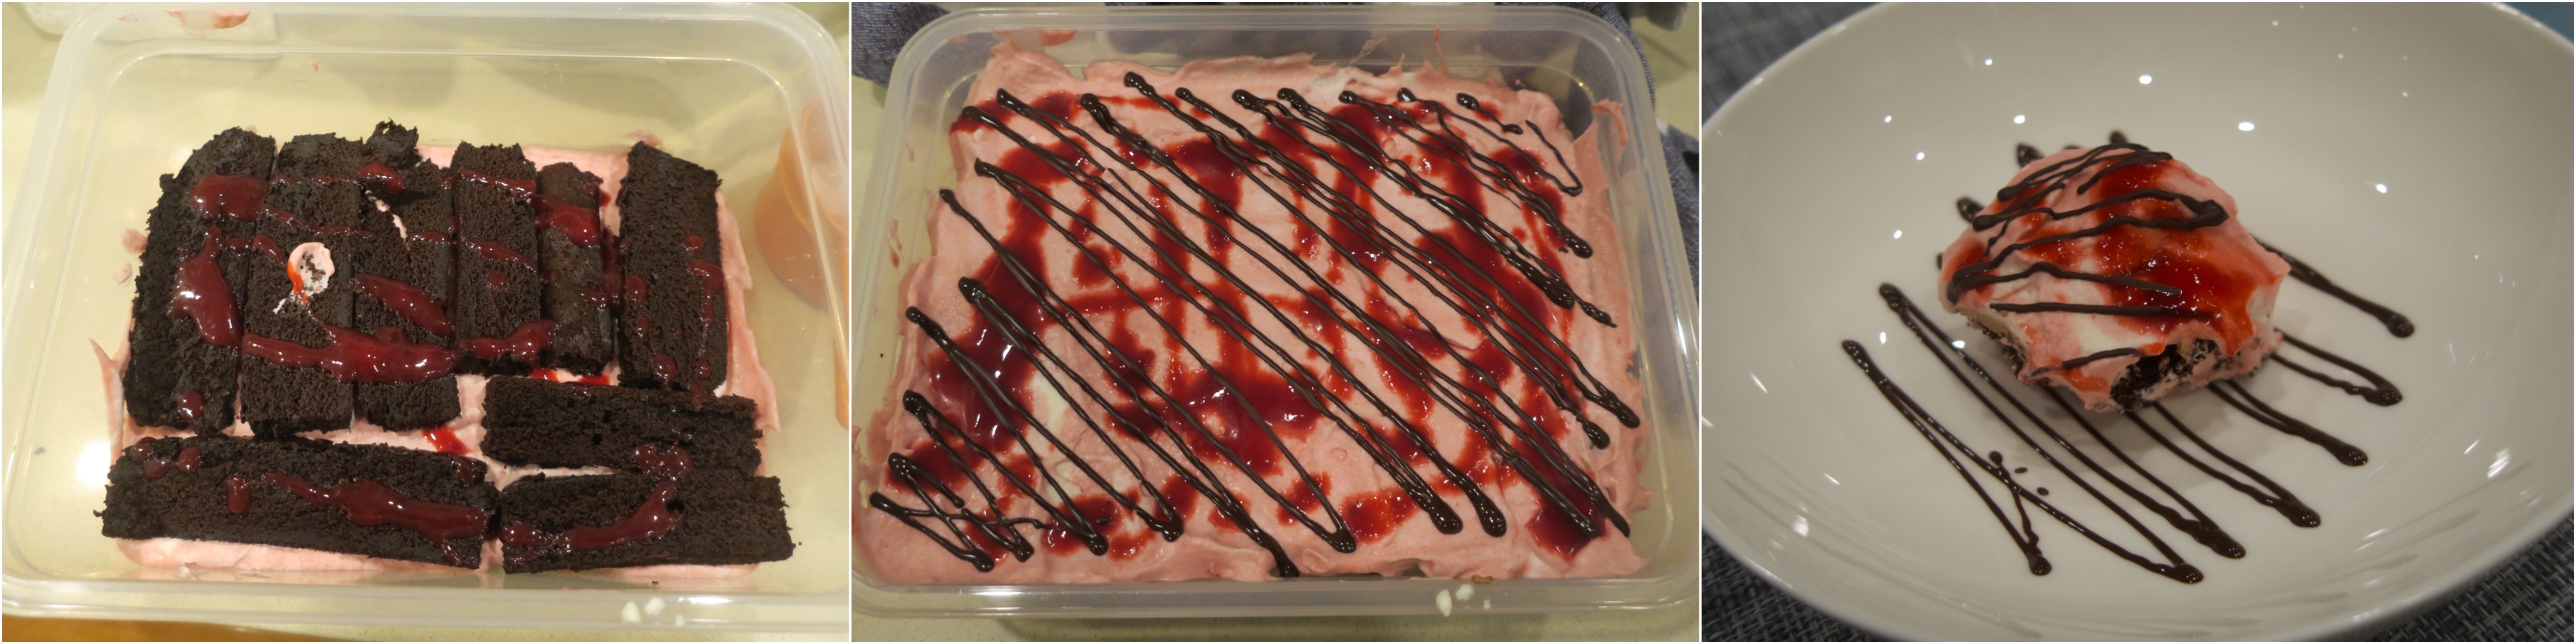 You really can’t go wrong with trifle. In the mood for raspberries but they’re too expensive? Boost the raspberry sauce with strawberries (you’ll need to blend it or crush them with a fork as you boil them). Not in the mood of raspberries at all? You can dip your cake pieces in a bit of coffee and layer them with just whipped cream: add a couple tablespoons of sifted icing sugar to the cream to stabilise it. To upgrade, fold mascarpone into the whipped cream and you can call it chocolate tiramisu. Or come up with your own version of flavoured light cream to layer with the cake.
5. Chocolate cake bonbons
And now, to going to use up all that leftover cake and some more icing, here are some delicious, rich little treats that go a long way. Such a long way that you might want to store half of them in the freezer for leaner days, should a chocolate treat emergency arise… They keep, freeze and defrost wonderfully; just make sure they’re stored in an airtight container or ziploc bag.
Really, these bonbons are “unpopped cake pops”. Cake pops are a lovely, whimsical treat and a lot of fun to make with kids, but it’s a little tricky to get the consistency right so that they actually stay on their pop sticks. If you want to read about how to do the real thing, here is a great explanation by Sally’s Baking Addiction.
The lazy way: by leaving your bonbons unpopped, you get all the taste, all the decadence, and all the preservative effect of the chocolate coating, with much less of the fiddly work. No need for a pop stand! The softness of your pop mix barely matters, they may be more caky or more gooey depending on how much frosting you add, but they will be delicious regardless.
Here’s how: A couple of hours before you start, take a small amount of butter cream (half a cup to a cup) out of the fridge or freezer and bring it to room temperature. (If it’s Swiss meringue, and if the consistency is half decent, you don’t need to re-beat it.) Then, get the last third of the sheet cake out of the fridge: it will actually help that it’s cold. Break it up into small chunks with a fork, then mash it with the butter cream. It should be a thick, sticky mess. Wet your hands with water and form little balls of the cake paste; lay them out on a baking sheet or tray lined with baking paper. Stick in the freezer for half an hour (it’s best not to leave it much longer, but if you need a longer break, you can start in the fridge, and then freeze for the last 20 minutes before you do the dipping).
Melt about 200g dark chocolate in a small bowl or ramekin. (Easiest is to microwave at 50% power in 30 sec intervals, stirring after each interval. Don’t overheat.) Dip the cold balls in the chocolate. Lay them back on the baking paper as the chocolate firms up. My method is to stick a small skewer into each ball, use that to dip, then ease it off the skewer using a second skewer. This creates a small hole in the chocolate coating, which would be totally fine but I plug them with a drop of melted chocolate because I’m a bit OCD about baking. And we’re all done: chocolate cake bonbons!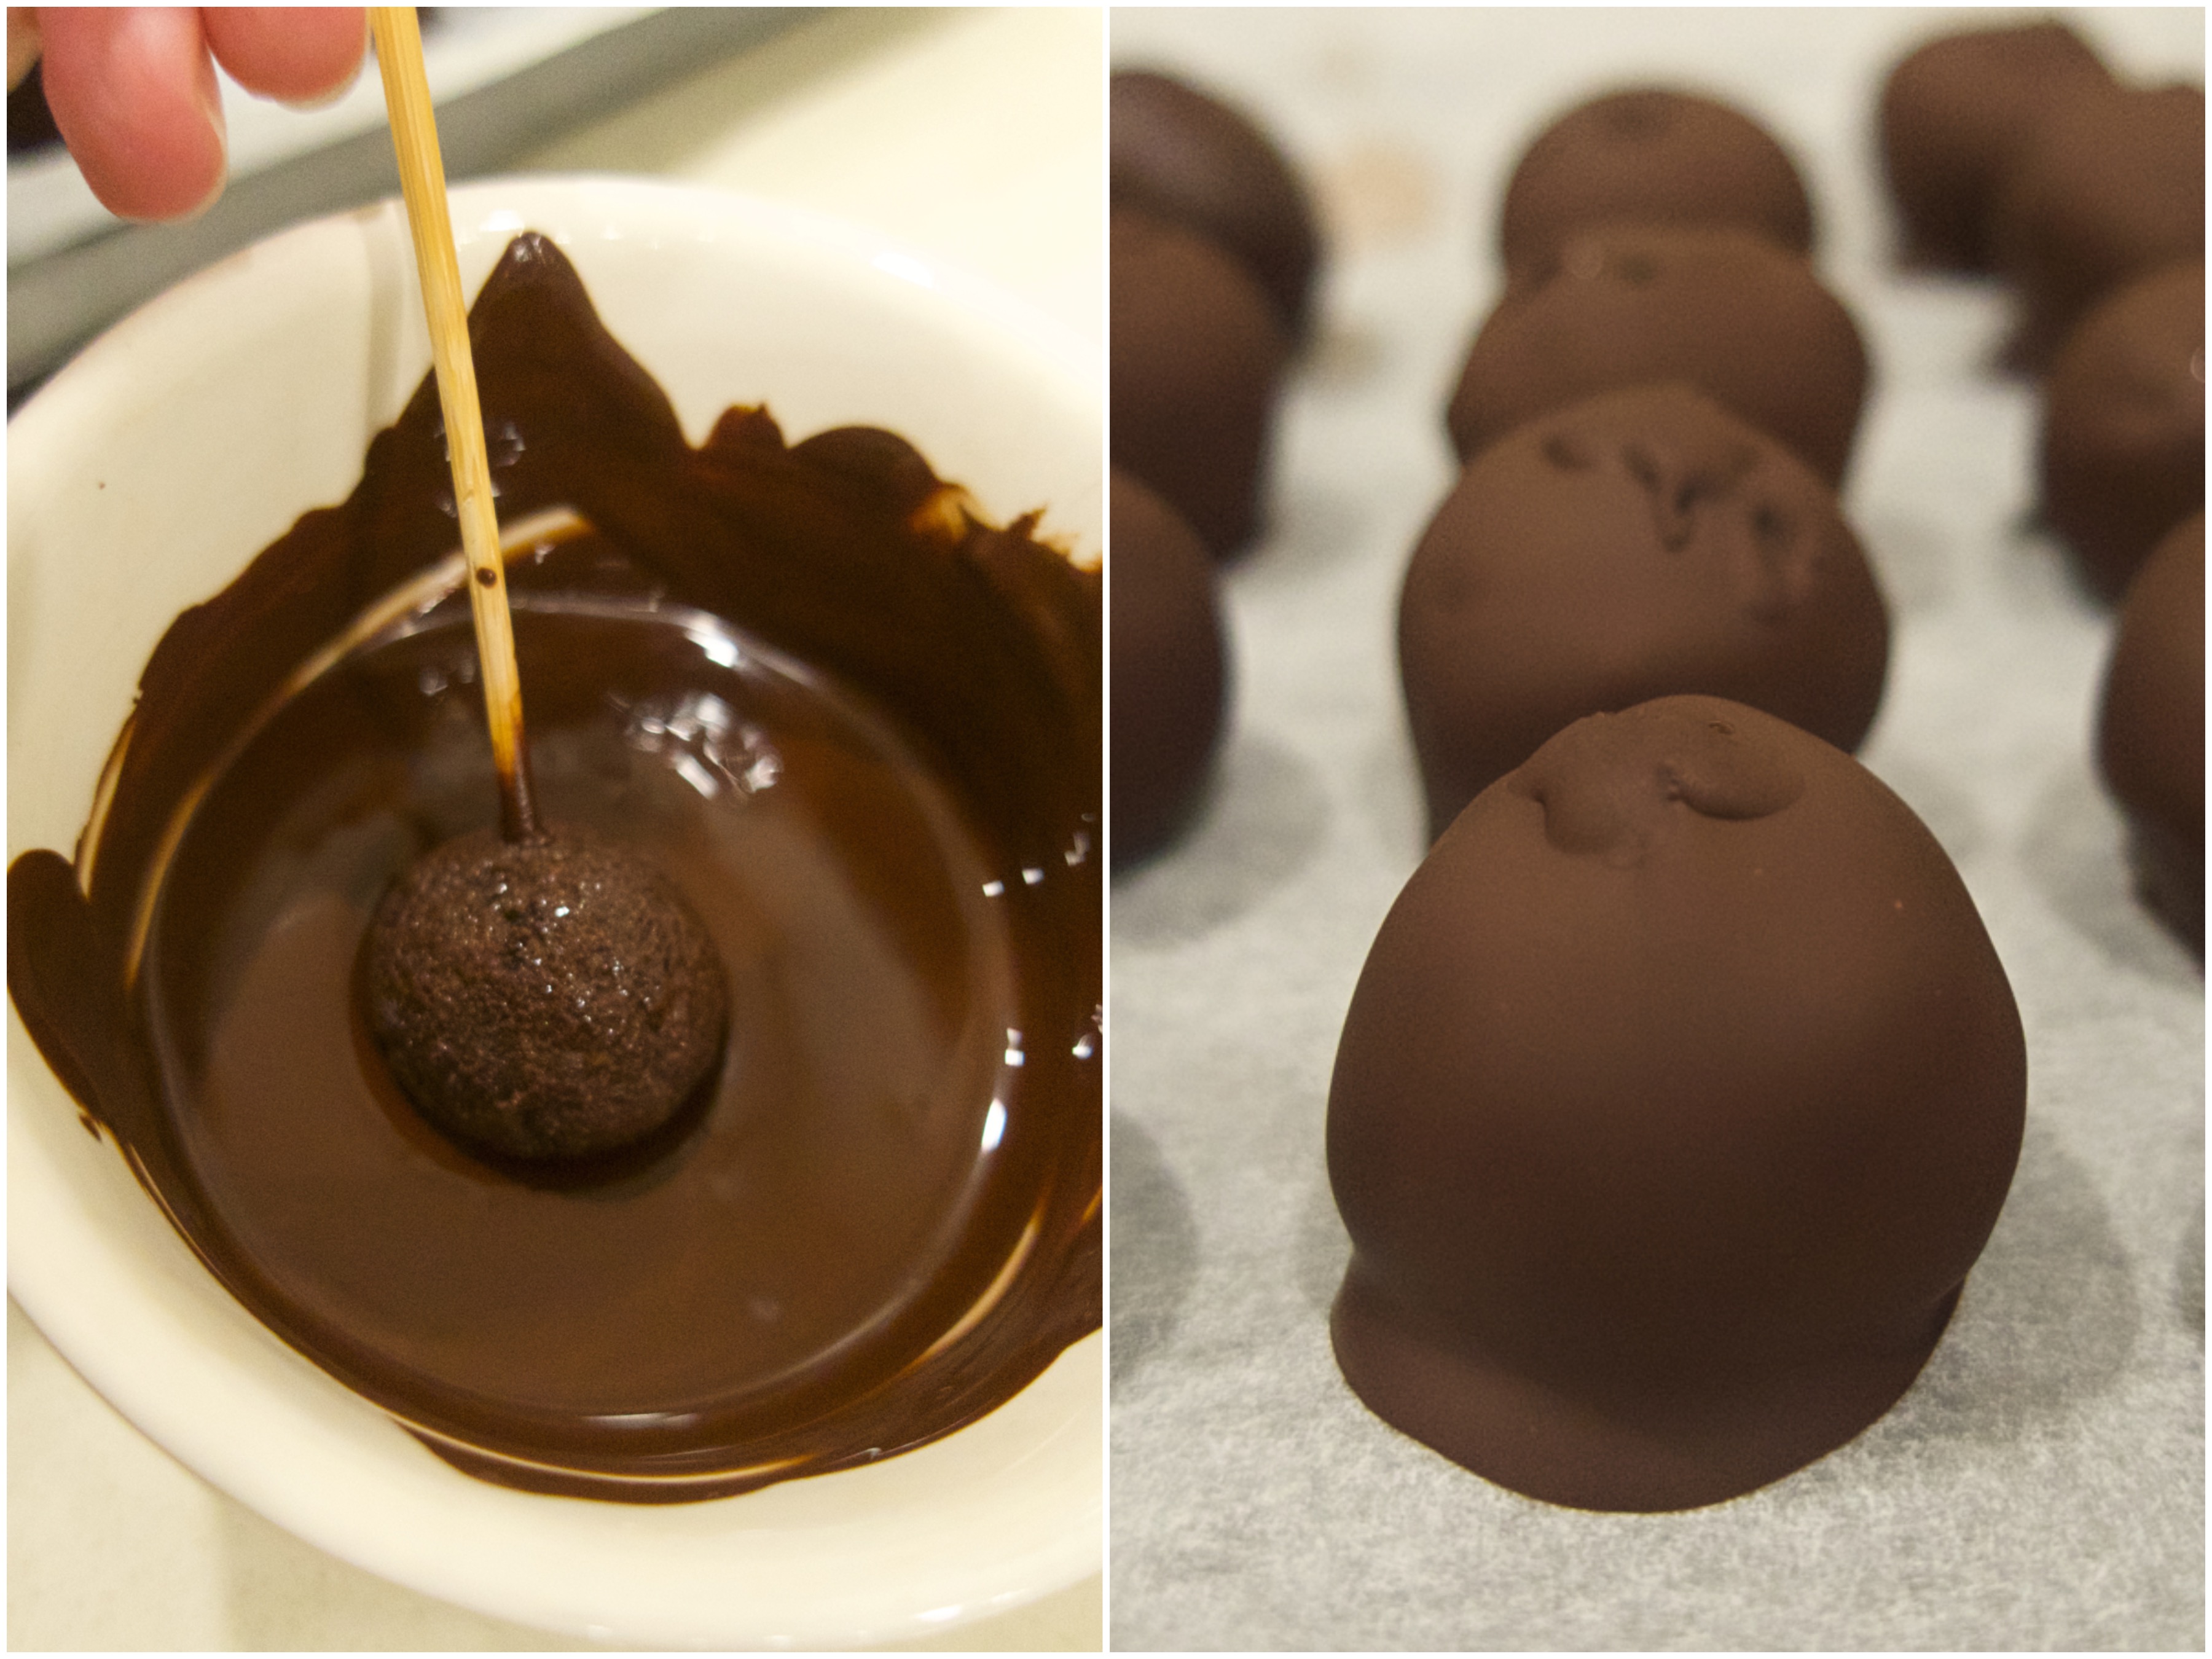
There you go, life’s biggest problem – how to sustainably eat chocolate cake every day – solved. You’re welcome.
Did you discover any kitchen secrets while quarantined?